Hello USD - Part 2: Type the rainbow
As it turns out, the problem yesterday with the Blender import will take someone better at Blender than I am to fix. I care about Blender in this context because I was considering it an easy way to get a .x3d file from a .usd file. As it stands I will probably try to find another way to do the conversion.
Let’s break down what I found. This post references Blender 3.6.0 on an intel Mac.
Four ways of getting a green cube
I made four files that all work in the Preview ap on MacOS Ventura 13.4. Each either uses an explicitly described mesh or the built in USD Cube definition. Then each of those model types was paired with either a primvar color setting or an stand alone Material definition.
| geometry type | primvar:displayColor | material |
|---|---|---|
| Cube type | 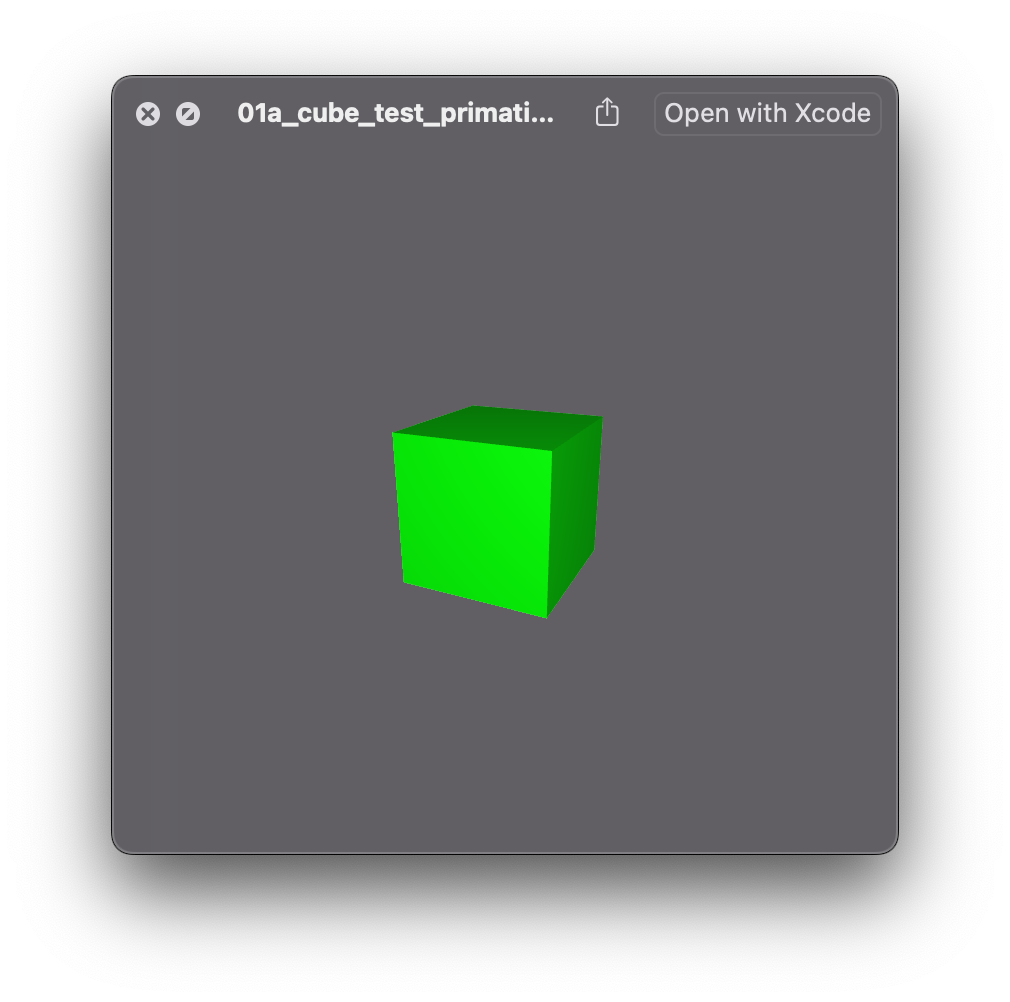 |
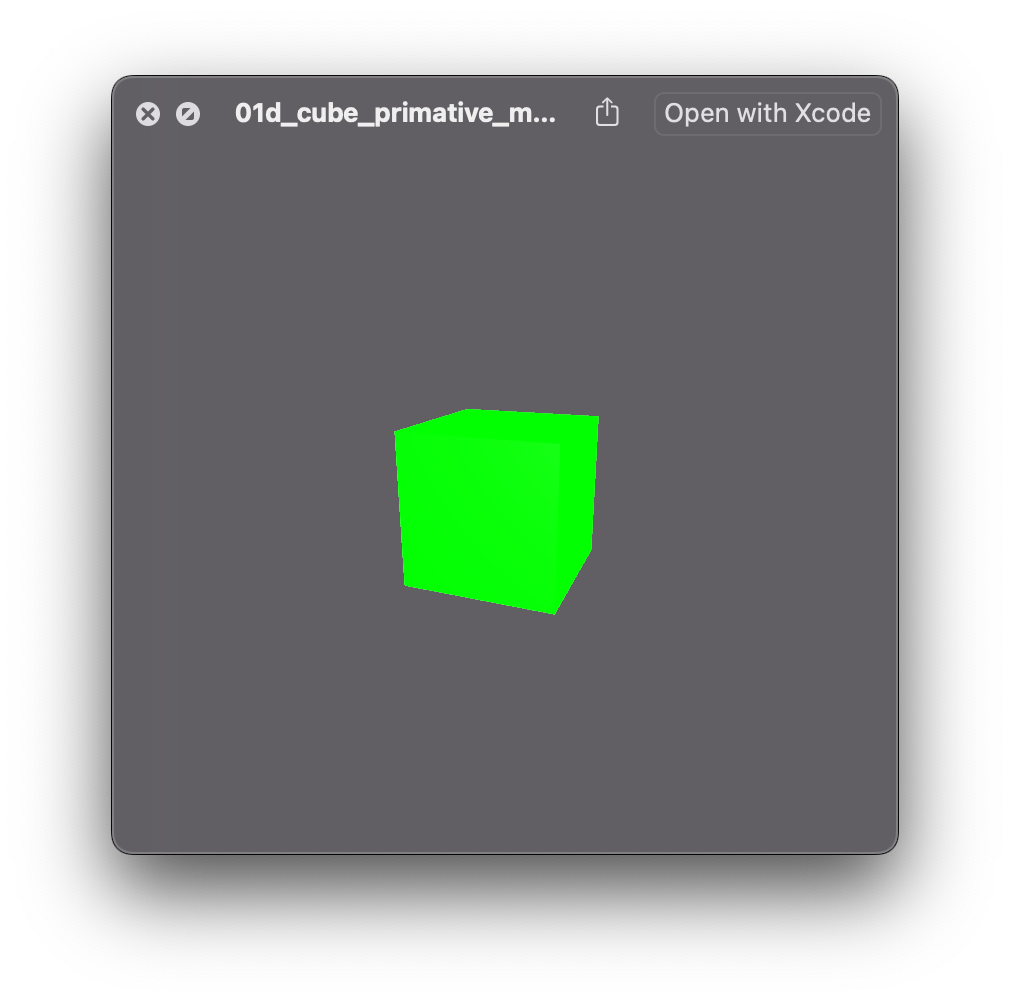 |
| Mesh type | 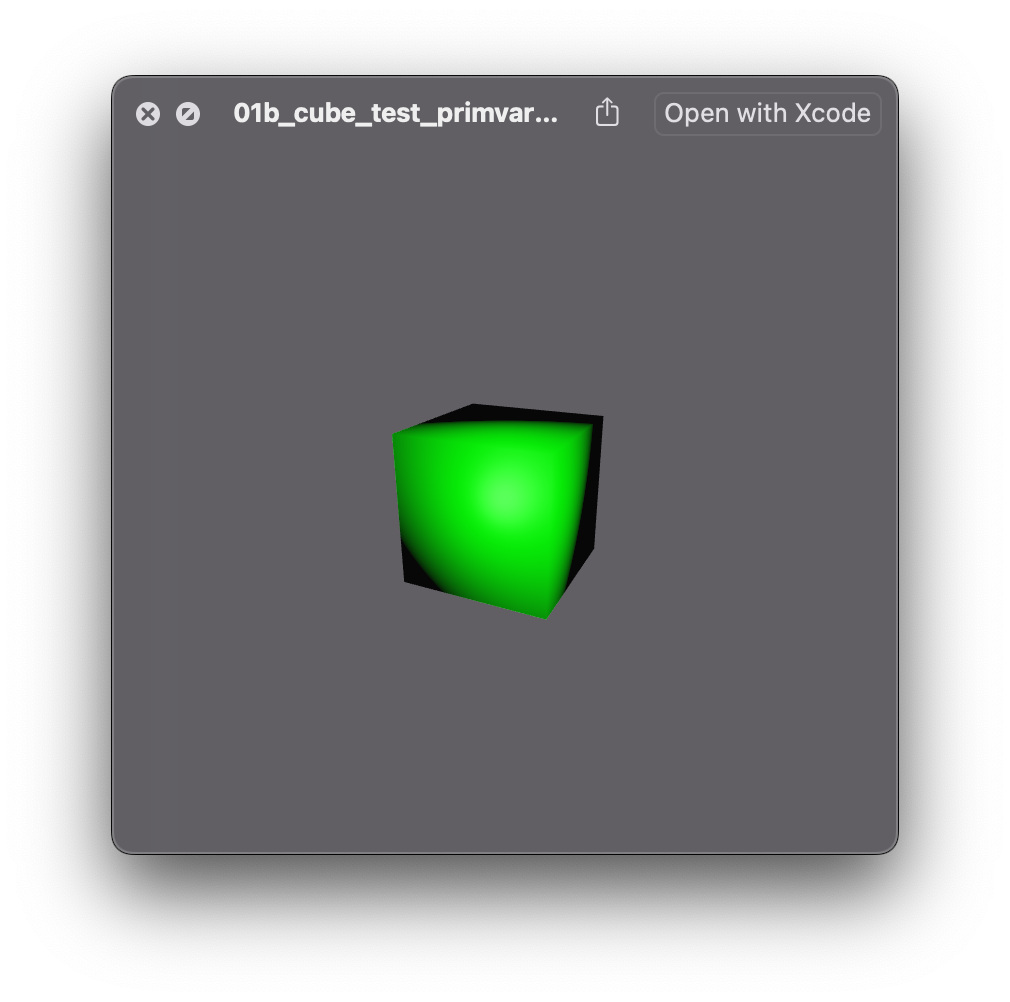 |
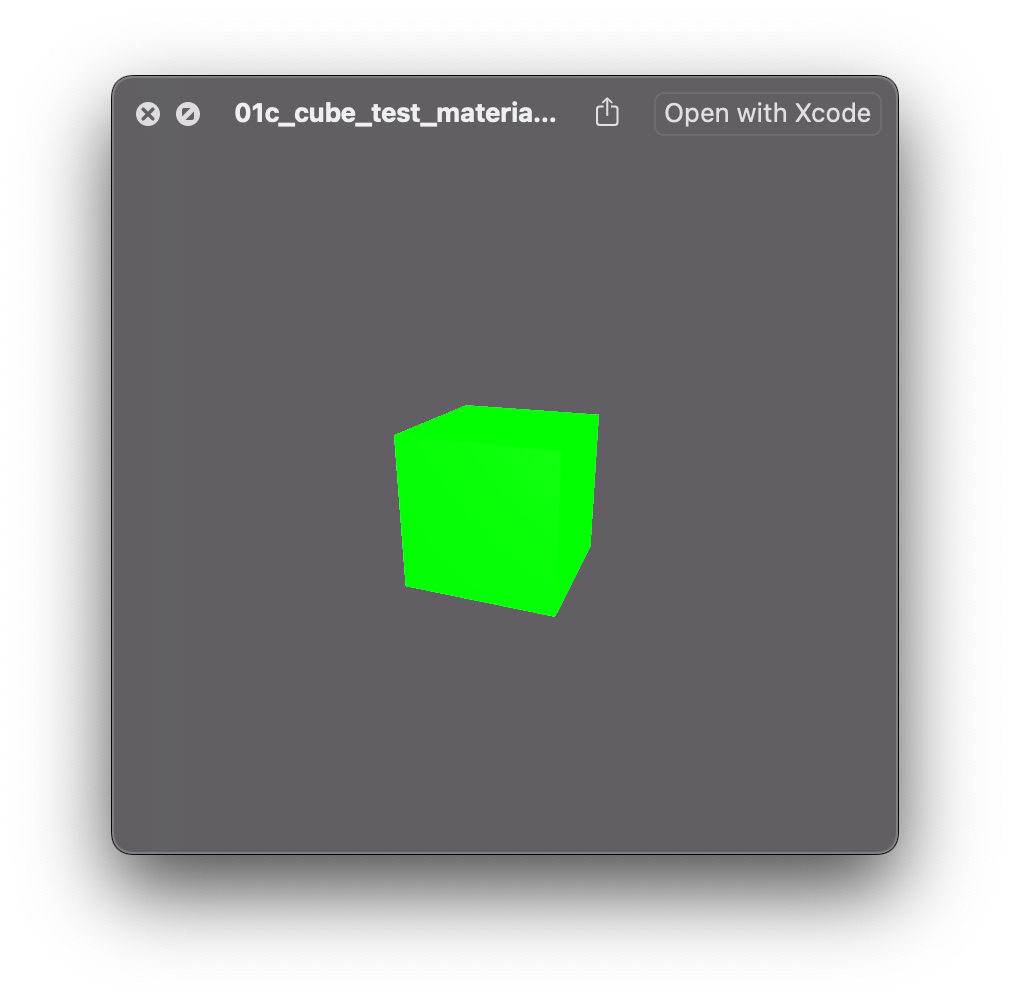 |
The look of the “material” does not match the color rendering for the “displayColor” style of color. That’s not a surprise and could probably be improved with tweaking. The material on the Cube prim and the mesh prim does render the same. What does peak my interest is that the displayColor does seem to render differently on the mesh and the Cube. Hmmm…
The USD files for these screen shots are below and in a github repo with other experiments.
Import tests into blender results
Only one of the 4 examples actually makes a green cube in Blender.
Wrinkle one, I mentioned that not all USD implementations support the built in geometry types Sphere, Cube, Cone, etc. The current import settings on Blender do a fantastic job setting up the mesh on import from the primitives, but the importer seems to loose the plot on other settings, parameters and Materials.
So while Blender does create from scratch a mesh for the following, it does NOT appear to import any color information into Blender.
#usda 1.0
(
    defaultPrim = "hello"
    upAxis = "Y"
)

def Xform "hello"
{
    def Cube "world"
    {
        float3[] extent = [(-2, -2, -2), (2, 2, 2)]
        color3f[] primvars:displayColor = [(0, 1, 0)]
    }
}
The next example will sort of import into Blender (related issue?) in that the color will appear in the mesh’s Color Attributes window as a vertex color, but it doesn’t actually seem to show anywhere in any of the different display modes? I know very little about Blender. This could be a crazy easy fix, but I don’t know how to do it.
#usda 1.0
(
    defaultPrim = "Cube"
    upAxis = "Y"
)


def Xform "Cube"
{
    def Mesh "cubeMesh"
    {
        float3[] extent = [(-2, -2, -2), (2, 2, 2)]
        int[] faceVertexCounts = [4, 4, 4, 4, 4, 4]
        int[] faceVertexIndices = [0, 1, 2, 3, 4, 5, 6, 7, 0, 6, 5, 1, 4, 7, 3, 2, 0, 3, 7, 6, 4, 2, 1, 5]
        point3f[] points = [(1, 1, 1), (-1, 1, 1), (-1, -1, 1), (1, -1, 1), (-1, -1, -1), (-1, 1, -1), (1, 1, -1), (1, -1, -1)]
        color3f[] primvars:displayColor = [(0, 1, 0)]
    }
}
What does work? Adding an explicit material to a MESH. Using the Cube won’t work.
#usda 1.0
(
    defaultPrim = "Cube"
    upAxis = "Y"
)


def Xform "Cube"
{
    def Mesh "cubeMesh"
    {
        float3[] extent = [(-2, -2, -2), (2, 2, 2)]
        int[] faceVertexCounts = [4, 4, 4, 4, 4, 4]
        int[] faceVertexIndices = [0, 1, 2, 3,   4, 5, 6, 7,   0, 6, 5, 1,
                                   4, 7, 3, 2,   0, 3, 7, 6,   4, 2, 1, 5]
        point3f[] points = [(1, 1, 1), (-1, 1, 1), (-1, -1, 1), (1, -1, 1), (-1, -1, -1), (-1, 1, -1), (1, 1, -1), (1, -1, -1)]
        uniform token subdivisionScheme = "none"
        rel material:binding = </myFlatGreen>
    }
}


def Material "myFlatGreen"
    {
        token outputs:surface.connect = </myFlatGreen/PBRShader.outputs:surface>

        def Shader "PBRShader"
        {
            uniform token info:id = "UsdPreviewSurface"
            color3f inputs:diffuseColor = (0, 1, 0)
            color3f inputs:emissiveColor = (0, 1, 0)
            float inputs:metallic = 0
            float inputs:roughness = 0.5
            int inputs:useSpecularWorkflow = 0
            token outputs:surface
        }
}
Hello green cube in x3d. (raw file)
So what did we learn today?
Meshes
Geometries in USD files can be described as meshes, points, nurbs, curves… lots of options. In this case we went from UsdGeomCube to a UsdGeomMesh.
A mesh, to pull from the definition in the USD docs, is “a point-based primitive… defined in terms of points that are connected into edges and faces.”
Describing a Cube’s mesh characteristics in terms of USD specs:
- First we leave the
extentas is to match theCubetype’s behavior (this prevented clipping in the viewer, try switching theextentto 1’s to see the difference, as the cube turns the corners will go “behind” the camera.). - A cube has 6 faces, each with 4 corners. =>
int[] faceVertexCounts = [4, 4, 4, 4, 4, 4] - A cube has 8 corners total, our cube will be from (1, 1, 1) to (-1, -1, -1) =>
point3f[] points = [(1, 1, 1), (-1, 1, 1), (-1, -1, 1), (1, -1, 1), (-1, -1, -1), (-1, 1, -1), (1, 1, -1), (1, -1, -1)] - Each face can be described as indexes into the point array. If its correct each index should be used 3 times (each of the faces it touches) =>
int[] faceVertexIndices = [0, 1, 2, 3, 4, 5, 6, 7, 0, 6, 5, 1, 4, 7, 3, 2, 0, 3, 7, 6, 4, 2, 1, 5]
Additionally one could describe the normals of the faces or corners, but in this simple cube case that doesn’t seem to be needed by either the Preview quick look or the Blender import. There also seems to be some debate as to whether one should use the schema definition i.e. do normal3f[] normals = [..] or add it as an indexable primvar, i.e. normal3f[] normals primvars:normals = [..] which is how Apple generated USD files also do it. (more on that tomorrow)
A little more on primvars
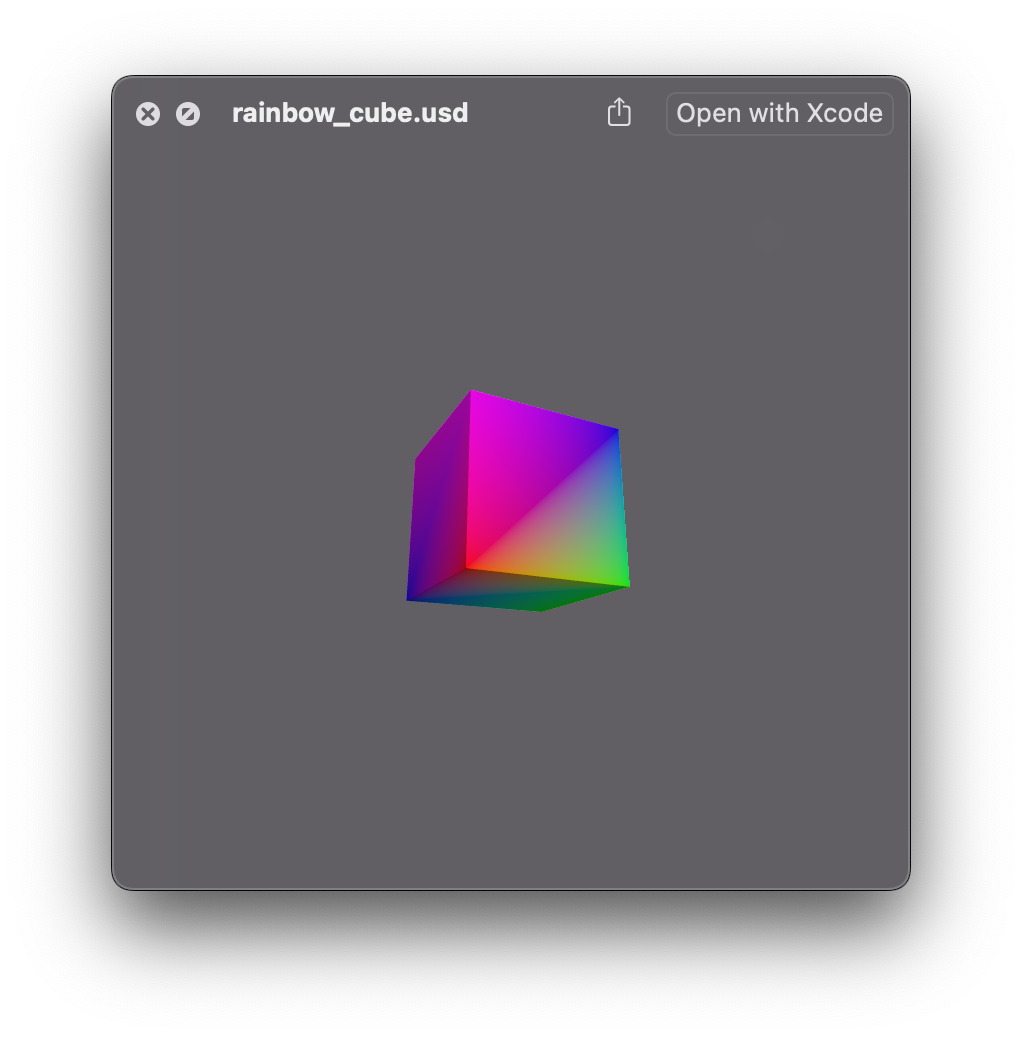
Both of the following make a glorious rainbow colored cube.
#usda 1.0

def Xform "Rainbow"
{

    def Mesh "cubeMesh"
    {
        float3[] extent = [(-2, -2, -2), (2, 2, 2)]
        int[] faceVertexCounts = [4, 4, 4, 4, 4, 4]
        int[] faceVertexIndices = [0, 1, 2, 3, 4, 5, 6, 7, 0, 6, 5, 1, 4, 7, 3, 2, 0, 3, 7, 6, 4, 2, 1, 5]
        point3f[] points = [(1, 1, 1), (-1, 1, 1), (-1, -1, 1), (1, -1, 1), (-1, -1, -1), (-1, 1, -1), (1, 1, -1), (1, -1, -1)]
        color3f[] primvars:displayColor = [(0, 0, 1), (1,0,1), (1,0,0), (0, 1, 0),(0, 0, 1), (1,0,1), (1,0,0), (0, 1, 0)](
          interpolation = "vertex"
        )
        uniform token subdivisionScheme = "none"
    }
}
#usda 1.0

def Xform "Rainbow"
{

    def Cube "cube"
    {
        float3[] extent = [(-2, -2, -2), (2, 2, 2)]
         color3f[] primvars:displayColor = [(0, 0, 1), (1,0,1), (1,0,0), (0, 1, 0),(0, 0, 1), (1,0,1), (1,0,0), (0, 1, 0)](
          interpolation = "vertex"
        )
    }
}
Lets look at this description of primvars from Pixar’s old RenderMan documentation:
Primitive Variables (also known as primvars) are data stored on objects. This data can be used for shading variation, much like user attributes. There are two main distinctions between the two - primvars cannot vary across instances, but they allow more specific variation - constant, uniform, varying, vertex, and facevarying.
The rainbow cube uses “vertex” interpolations with an array of colors defined in primvars, the type of process which can also be used to create heat maps, etc. (example using Omniverse)
“st” seems to be another common primvar set used for… something… related to “uv”??? It will all become clear at some point.
Also a useful read https://www.sidefx.com/docs/houdini/solaris/usd.html#attrs
Attaching Materials to Shapes
Recommended Reading:
- https://openusd.org/release/api/class_usd_shade_material.html#details
- https://openusd.org/release/wp_usdshade.html
- https://openusd.org/release/glossary.html#usdglossary-connection
- After tomorrow: https://openusd.org/release/tut_simple_shading.html
Step 1: Create the Material description.
Lets look at the Material description from the green cubes. I pulled the bones of this from out of an Apple Reality Composer usdz file export. How to do that is tomorrow’s topic.
def Material "myFlatGreen"
    {
        token outputs:surface.connect = </myFlatGreen/PBRShader.outputs:surface>

        def Shader "PBRShader"
        {
            uniform token info:id = "UsdPreviewSurface"
            color3f inputs:diffuseColor = (0, 1, 0)
            color3f inputs:emissiveColor = (0, 1, 0)
            float inputs:metallic = 0
            float inputs:roughness = 0.5
            int inputs:useSpecularWorkflow = 0
            token outputs:surface
        }
}
def Materialwe are defining a UsdShadeMaterialtoken outputs:surface.connecta connection type connects the Shader’s output attribute to the materials output attribute.def Shaderwe are defining the UsdShadeShader different renderers might draw upon different Shaders for the same Material, for example.uniform token info:id = "UsdPreviewSurface"UsdPreviewSurface A promise that this surface is simple enough to use in most applications. It’s a “a more flexible, non-ubersurface, style of describing surfaces”. This texture will work for both “metallic” and “specular” workflows. (excellent 5 min video on those 2 terms)
Every item after that is either and input or output for our UsdPreviewSurface and is documented here: https://openusd.org/release/spec_usdpreviewsurface.html (same link as above.)
Step 2: Link the Material
There doesn’t seem to be one answer as to where one should create a Material. When looking into why Blender wasn’t importing the Material on my files I tried SEVERAL methods, all of which work in Preview.
Some people create a file for all their materials, some people put the material in their primitive. It depends on your project’s organization.
Wherever it lives, it will have a location path to create the relationship.
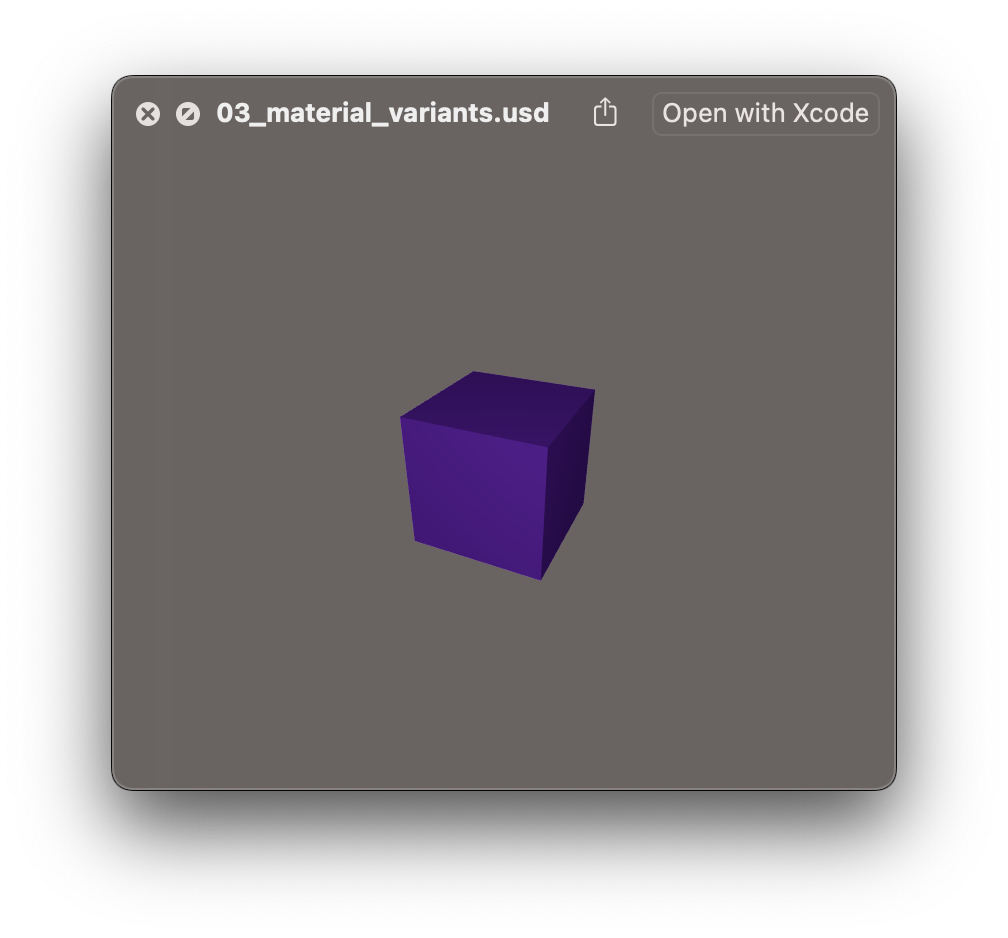
Take the example below. It has a catalog of colors that then “MyCube” makes variants of. Switching the variant name in the “MyCube” definition will switch the color in the viewer.
| myFlatGreen | exportedBlenderPurple | exportedApplePurple |
|---|---|---|
 |
 |
 |
#usda 1.0
(
    defaultPrim = "MyCube"
    upAxis = "Y"
)

def Xform "MyCube"
(
    variants = {
        string shadingVariant = "purple_01"
    }
    prepend variantSets = "shadingVariant"
)
{
    def Mesh "cubeMesh"
    {
        rel material:binding
        float3[] extent = [(-2, -2, -2), (2, 2, 2)]
        int[] faceVertexCounts = [4, 4, 4, 4, 4, 4]
        int[] faceVertexIndices = [0, 1, 2, 3, 4, 5, 6, 7, 0, 6, 5, 1, 4, 7, 3, 2, 0, 3, 7, 6, 4, 2, 1, 5]
        point3f[] points = [(1, 1, 1), (-1, 1, 1), (-1, -1, 1), (1, -1, 1), (-1, -1, -1), (-1, 1, -1), (1, 1, -1), (1, -1, -1)]
        uniform token subdivisionScheme = "none"
    }

    variantSet "shadingVariant" = {
        "purple_01" {
            over "cubeMesh"
            {
                rel material:binding = </SolidColorMaterials/exportedBlenderPurple>
            }
        }

        "green" {
            over "cubeMesh"
            {
                rel material:binding = </SolidColorMaterials/myFlatGreen>
            }
        }

        "purple_02" {
            over "cubeMesh"
            {
                rel material:binding = </SolidColorMaterials/exportedApplePurple>
            }
        }
    }
}


def Scope "SolidColorMaterials"
{
    def Material "myFlatGreen"
        {
            token outputs:surface.connect = </SolidColorMaterials/myFlatGreen/PBRShader.outputs:surface>

            def Shader "PBRShader"
            {
                uniform token info:id = "UsdPreviewSurface"
                color3f inputs:diffuseColor = (0, 1, 0)
                color3f inputs:emissiveColor = (0, 1, 0)
                float inputs:metallic = 0
                float inputs:roughness = 0.5
                int inputs:useSpecularWorkflow = 0
                token outputs:surface
            }
    }

    def Material "exportedBlenderPurple"
    {
        token outputs:surface.connect = </SolidColorMaterials/exportedBlenderPurple/previewShader.outputs:surface>

        def Shader "previewShader"
        {
            uniform token info:id = "UsdPreviewSurface"
            color3f inputs:diffuseColor = (0.8000001, 0.1429553, 0.52986294)
            float inputs:metallic = 0.2
            float inputs:roughness = 0.4
            token outputs:surface
        }
    }

    def Material "exportedApplePurple"
    {
        token outputs:surface.connect = </SolidColorMaterials/exportedApplePurple/PBRShader.outputs:surface>

        def Shader "PBRShader"
        {
            uniform token info:id = "UsdPreviewSurface"
            color3f inputs:diffuseColor = (0.31854683, 0.033104762, 1)
            color3f inputs:emissiveColor = (0, 0, 0)
            float inputs:metallic = 0
            float inputs:roughness = 0.55
            int inputs:useSpecularWorkflow = 0
            token outputs:surface
        }
    }
}
Full disclosure, I tried and failed to create a stage with all three variants on it last night. The cubes were there, but the materials were not.
To figure out how to do better I need to use some of the tools I’ve been quietly using all along. Tomorrow’s post will be all about installing the existing (non-Beta) python, C++ and XCode command-line tools.